Last summer I decided I’d borrow the Uni-Go trailer from Red
Dog [my Piaggio MP3 500 scooter] and try to get in a little camping. There were
no hitches available for the NT700V so I engaged Bandon Fabrication to build
one, the same shop that built Red Dog’s. The project turned out fine but
because I took two trips to Mexico [on another bike] I used up all of my
available camping time. Shortly after returning home I was contacted by a local
BMW rider who’d heard about my Uni-Go and stopped by to ask if I’d sell it. After
some discussion we agreed on a price we could both live with and it went away
the next day. Hey, everything’s got a price, right?
That left me with a hitch I no longer had need for so I
decided to sell it. Before it’s gone I thought I’d post a few pictures of the
installation sequence in case anyone is interested in building one of their
own. I won’t attempt to instruct in the actual fabrication end of it as that’s
the rightful domain of people in the trade; personally I’m clueless in that
area. Hopefully the photos will shed some light on how we did it.
Components included with
the hitch:
1 ea Main Hitch Frame assembly w/pre-drilled plate for hitch
ball
2 ea Vertical Support Rod
2 ea Upper Vertical Rod Support Bolt, 3 x ½” w/locking nylon
nut
2 ea Lower Vertical Rod Support Bolt, 1 x ¼” w/locking nylon
nut
2 ea Foot Peg Bolt, 2 ½” x 5/16” w/nut, flat washer, &
locking washer
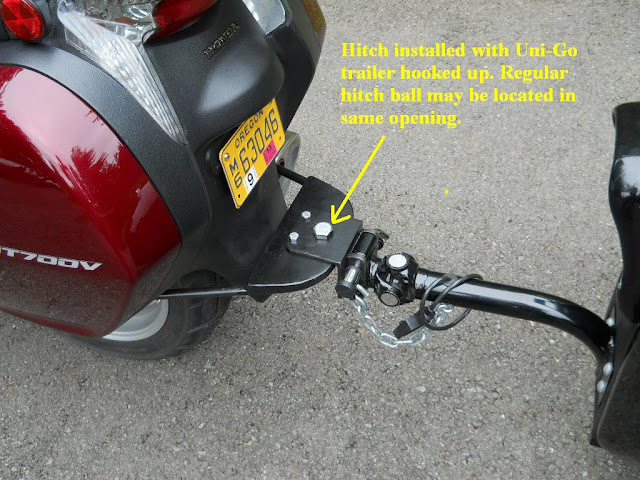
The photo below shows the hitch as it will be
sold. The next photo shows the hitch with the Uni-Go receiver installed.
The buyer will need to provide his own ball or receiver as needed. I’ve had both
a regular ball and a Uni-Go receiver installed so holes are pre-drilled for
each.
Installing the hitch
To begin remove the saddle and slide the Vertical Support
rods down through the slots in the plastic just to the rear of the chassis box
mount connection point.
Next
step connect the vertical support rods to the chassis box using the large
bolts. If your chassis box doesn't have the holes pre-drilled do so now, then
connect the rods.
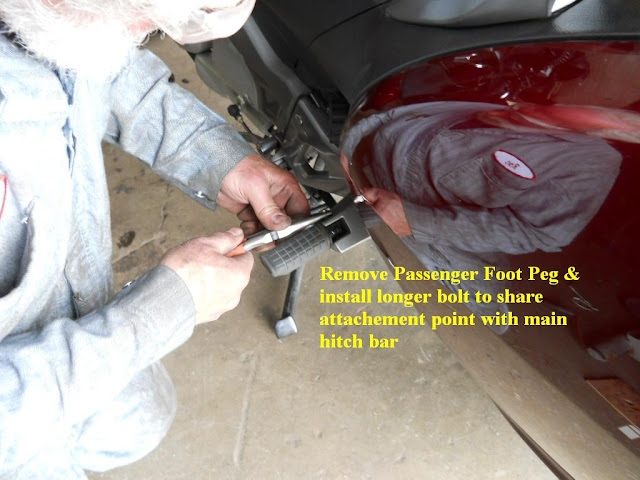
Remove passenger foot pegs. These will be the forward connecting
points for the main hitch rails.
Next slide the main hitch rails into the bike from the rear.
Go all the way forward until the rails are positioned at the tops of the
passenger foot peg brackets. Using the longer bolts provided connect the hitch
rails and at the same time re-install the foot pegs in their original position.
Do not tighten yet, wait until everything is installed and aligned.
Connect the vertical
support rods to the main hitch rails.
Finally check the
alignment of the rails to make sure nothing is rubbing; then tighten all nuts
firmly.
This was Red Girl as set up to pull the Uni-Go trailer.
That should do it for now; I’m posting the hitch on the
NT700 Owners Forum and expect it will go away fast. As for Red Girl I’m
anticipating a nice long summer tour on her starting in May sometime. Per usual
I haven’t a clue where I’ll head but that’s the fun of it.
Hope to see you on the road.
LL


